Aluminum extrusion frames assemble fast and stay square, which is why they are so often paired with wood panels for workstations, cabinets, machine guards, and retail fixtures. The trouble starts at the interface. A T-slot frame is straight and dimensionally stable; a wood panel is neither. The joint that felt rigid on assembly day loosens, squeaks, or stains the wood a season later.
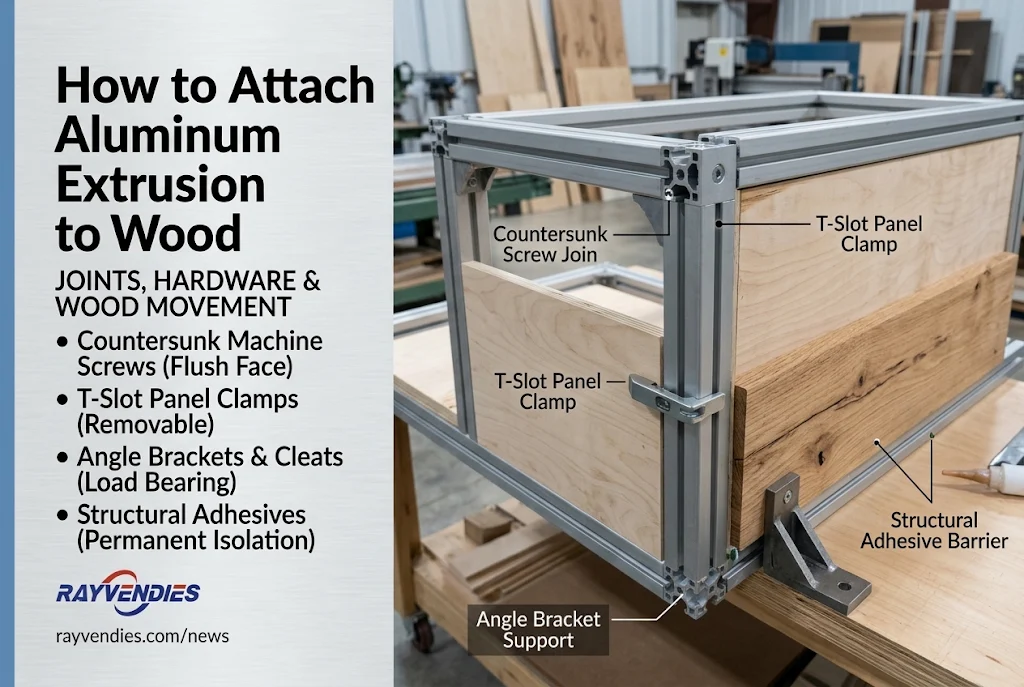
The most reliable way to attach aluminum extrusion to wood is a mechanical joint that lets the wood move. Use a countersunk machine screw through the panel into a T-nut for a flush permanent face, a T-slot panel clamp where the panel must come out again, and an angle bracket or cleat where the wood carries load. Structural adhesive suits only decorative panels that will never come apart, and even then it needs isolation washers and a drainage path.
The sections below cover the three material differences that govern every joint, the four attachment methods, and the detailing rules that decide whether the assembly survives its first heating season.
Why Wood and Aluminum Extrusion Behave Differently at a Joint
Three properties set the terms of every wood-to-aluminum joint. The materials move by very different amounts, they form a galvanic couple whenever moisture bridges them, and aluminum threads strip long before a steel bolt reaches rated torque. Fastener choice is downstream of those facts.
Most failures blamed on hardware are the frame fighting the panel, and the way aluminum extrusion profiles are produced explains both the consistency of the section and the thin walls that limit clamp load.
Dimensional Movement at Two Very Different Rates
Aluminum expands about 23 micrometers per meter per kelvin, so a 600 mm extrusion in a space swinging 20 C moves roughly 0.28 mm. Wood moves with moisture across the grain at about 0.3 percent per one percent change in moisture content, so the same panel travels around 5 mm over a three-point indoor swing. Twenty times the movement, in one direction only: the wood pushes and the extrusion does not yield.
Galvanic Coupling and Trapped Moisture
Aluminum sits low on the galvanic series, near minus 1.0 volts against a silver chloride reference in seawater, while passive stainless sits near minus 0.4, so the aluminum becomes the anode and gives up metal. This is ordinary galvanic corrosion, and it needs a continuous electrolyte. Wood supplies one: hygroscopic, holding moisture against metal, wicking water through end grain. A dry indoor frame is safe; a washdown enclosure is not.
Thread Engagement in a Soft Alloy
Profiles are usually 6063 or 6061 in T5 or T6, chosen for formability and finish rather than thread strength. A screw tapped into the wall strips the aluminum well below steel-to-steel torque, and the thin slot lips deform before the bolt yields. Engagement should run to about twice the fastener diameter, which usually means a T-nut or thread insert, and published steel torque figures are a ceiling.
How Do You Make the Joint Secure? Four Methods Compared
Security comes from the load path, not the price of the hardware. A joint is secure when force travels from the wood into the extrusion through a component designed for that direction of load, and when the wood stays free to move where it must. The differences between methods are mostly access, appearance, and whether the panel ever comes off.
| Method | Best for | Removable | Load path | Visible hardware | Typical failure |
| T-slot panel clamp | Thin to medium panels | Yes | Clamp friction in the slot | Hidden | Slips if under-tightened |
| Machine screw into T-nut | Flush permanent panels | Semi-permanent | Tension through the panel | Countersunk | Stripped nut or crushed face |
| Bracket or joining plate | Shelves, tabletops, guards | Yes | Direct into the frame | Visible | Bending or loosening |
| Structural adhesive | Decorative seamless faces | No | Shear across the bond line | None | Peel at an edge |
Matching the Method to the Load Path
A panel hanging inside a frame sees in-plane load and the frame does the structural work, while a shelf, tabletop, or guard rail sees out-of-plane bending that must reach the aluminum directly. The profile series sets the ceiling. T-slot framing has no single published standard, so compatibility comes from conventional series, and because the series and T-slot sizes decide which nuts and clamps fit, the hardware decision is made when the profile is specified.
Matching the Method to Serviceability
Ask one question before drilling: does this panel ever come out? A panel holding a graphic, a filter, or a removable shelf needs a reversible joint, which points to clamps or brackets. Knock-down structures are struck repeatedly, and every cycle works a screwed joint loose, so brackets survive where a bonded joint does not.
Panel Clamps and Retainer Strips for Removable Wood Panels
Panel clamps are the cleanest option when the wood must stay removable and no hole should show in the face. The clamp body slides into the T-slot, rotates to trap the panel edge, and tightens with a set screw, so the panel is held by friction rather than by a fastener through it.
The method is only as good as the panel fit, since an undersized panel lets the clamp bottom out before it grips.
Installing a Clamp-Mounted Panel
- Cut the panel to the clear opening minus the clearance allowance for its width.
- Mark clamp positions at roughly 300 mm intervals, plus one near each corner.
- Slide the clamp bodies in from the open profile end, or drop them through the slot.
- Seat the panel, rotate each clamp onto the face, check both diagonals for square, then tighten.
- Torque in a cross pattern from the center outward so the panel is not pushed aside.
Groove Width and Clearance
Nominal thickness is not actual thickness: an 18 mm plywood or MDF panel commonly measures 17.5 to 18.5 mm, and a laminated panel can run thicker at the edges than the middle. A groove cut to exactly 18 mm will refuse the panel or crush its face. Most T-slot accessories for panel retention assume a slot 1 to 2 mm wider than nominal indoors.
Screws, T-Nuts, and Threaded Inserts for Flush, Permanent Joints
For a flush face, drive a countersunk machine screw through the wood into a T-nut captured in the slot. The nut carries load in the aluminum, the countersink carries it in the wood, and nothing protrudes above the surface.
Machine Screws into T-Nuts
Nut style follows access: roll-in nuts slide in from an open profile end and give the most engagement, drop-in nuts pass through the slot and rotate ninety degrees to lock, and spring-loaded nuts hold position while the panel is aligned. Where no nut can be slid in at all, a blind rivet nut set from the accessible side forms a threaded anchor against the far wall. Match the countersink to the head, 82 degrees imperial or 90 degrees metric, because a mismatch gives line contact and the head works loose.
Thread-Forming Screws Driven into the Extrusion
Driving a screw straight into aluminum is acceptable only where the wall is thick and the load light. Use thread-forming rather than thread-cutting screws for more shear area in a soft alloy, keep the pilot hole close to the minor diameter, and clear chips as you go, since aluminum smears rather than cutting cleanly.
Torque and Thread Engagement
| Thread | Minimum engagement | Reference torque into a T-nut | Watch for |
| M4 | 6 mm | 1.5 to 2.5 N·m | Crushed plywood face |
| M5 | 8 mm | 3.0 to 4.5 N·m | Slot lip deformation |
| M6 | 12 mm | 6.0 to 9.0 N·m | Nut rotating in the slot |
| M8 | 16 mm | 12 to 18 N·m | Profile wall distortion |
Confirm these against supplier data. If the screw keeps turning without gaining resistance, the thread has already failed.

Brackets, Plates, and Cleats for Structural Loads
When the wood carries load rather than closing an opening, route that load around the panel and into the frame. An angle bracket bolted to the extrusion with T-bolts and screwed to the wood with wood screws does this directly, and it is the only method here that scales to tabletops and guards without relying on panel stiffness.
Angle Brackets and Gussets
Fix the bracket to the profile first, then drive wood screws through the flange: two brackets per joint minimum, three or four for anything a person will lean on, and a gusset where racking is a concern. The same hardware used to connect aluminum extrusions to one another works here, so a frame built from plates and T-bolts already has everything on site.
Cleats and Tabletop Fasteners
A wood cleat screwed to the panel underside and bolted to the extrusion spreads load along the edge instead of concentrating it at four points, and the standoff lets air move behind the panel. A tabletop fastener clip screwed to the wood with its tab engaging the groove holds the top down while allowing it to slide, which is the point: a wide top that cannot move will split.
What Is the Best Adhesive to Bond Aluminum to Wood
Two-part epoxy is the best general answer for a structural bond between aluminum and wood. Polyurethane is better where the joint will flex or see damp service, and a modified silane polymer wins where ultraviolet exposure and weather dominate. None of them replaces a mechanical fastener on a panel that carries load or gets pried at its edges.
| Adhesive family | Shear strength | Flexibility | Weather and UV | Working time | Best application |
| Two-part epoxy | Very high | Low | Good | 5 to 60 min | Rigid structural bonds |
| Polyurethane | High | Moderate | Fair | 20 to 40 min | Slight flex, damp service |
| Structural acrylic | High | Moderate | Good | 5 to 15 min | Fast assembly, less prep |
| Modified silane polymer | Moderate to high | High | Excellent | 20 to 40 min | Exterior trim and facades |
| Silicone | Low | Very high | Excellent | 10 to 20 min | Sealing only |
Preparing Anodized and Mill-Finish Surfaces
Anodized aluminum is the harder surface to bond, because the oxide layer is hard, chemically stable, and low in surface energy, so an adhesive that wets mill finish well may not wet it at all. Abrade with 120 to 180 grit, wipe with a residue-free solvent, and prime if the system calls for it. Wood needs the opposite: a freshly machined face at 8 to 12 percent moisture content. Bond strength depends on wood, adhesive, and interphase being controlled together, as the USDA Forest Service Wood Handbook sets out in its chapter on wood adhesives.
Clamp Pressure, Cure, and When Adhesive Alone Fails
Pressure should be uniform and enough to bring the faces into intimate contact without starving the bond line, with clamps at 150 to 200 mm centers. Adhesive alone fails in one predictable way: peel. Any joint where a tool or a shifting load can pry a free edge will eventually lift it, and once peel starts it propagates.
Preventing Galvanic Corrosion and Surface Staining
Break the electrical path and give water somewhere to go. Either measure alone is insufficient, because isolation that traps moisture creates a crevice cell, and drainage without isolation still leaves bare metal in contact.
Breaking the Electrical Path
Nylon washers under heads, shoulder sleeves through clearance holes, and insulating gaskets between dissimilar faces interrupt the circuit where it would otherwise form. Sealant around the fastener entry does double duty, excluding water and blocking the path through the thread. Anodizing helps, but the film is abraded at exactly the contact points that matter, so it should never be the only barrier.
Draining and Finishing in the Right Order
Orient slots so they drain rather than cup water, and avoid ledges where debris collects against the joint. Finish the wood before assembly, because finish brushed into an assembled joint bridges the gap the panel needs. Tannins in oak and walnut react with aluminum and leave dark gray stains, so seal the end grain, where moisture and tannins travel.
Detailing the Joint So the Wood Can Move
Every hole through wood should be larger than the fastener passing through it, and every wide panel needs clearance at its edges. A joint detailed this way stays tight because it never fights the panel.
Hole and Slot Sizing
A clearance hole should run 1 to 2 mm larger than the screw shank. For wide panels, replace round holes with slots elongated in the direction of movement, fix the panel near its center, and let the slots radiate outward, because fastening both ends rigidly converts 5 mm of seasonal movement into a split.
Panel Clearances
| Panel width | Total allowance, indoor | Total allowance, outdoor |
| up to 300 mm | 2 mm | 4 mm |
| 300 to 600 mm | 4 mm | 8 mm |
| 600 to 900 mm | 6 mm | 12 mm |
| 900 to 1200 mm | 8 mm | 16 mm |
Split the allowance across both edges so the panel stays centered, and hide the gap behind a lip where the reveal matters.
From One-Off Builds to Repeatable Production
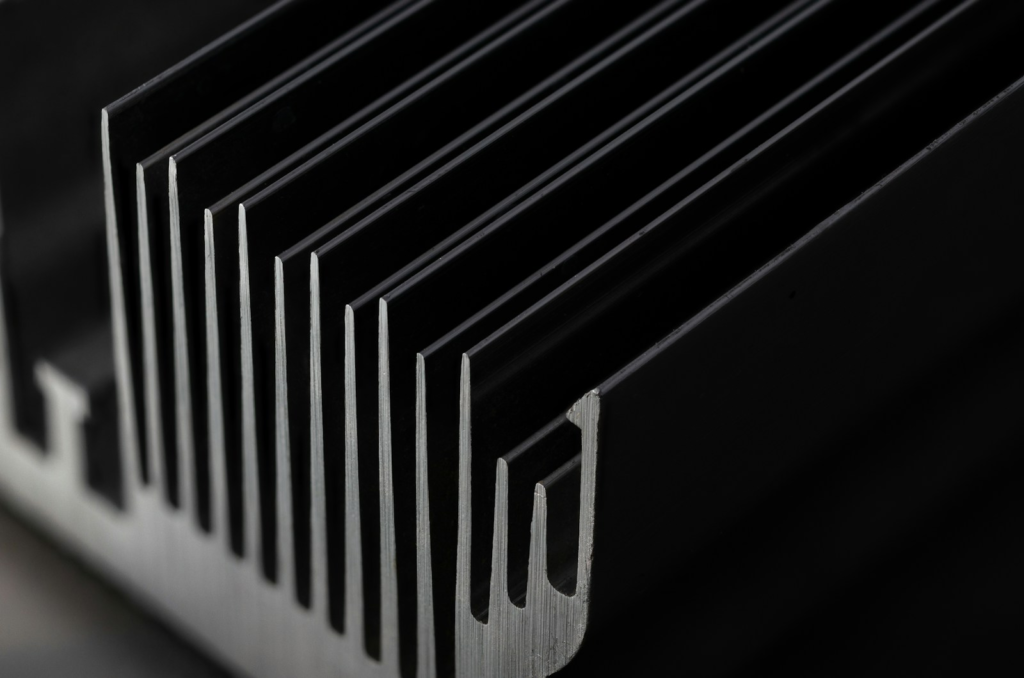
In volume, the joint stops being a hardware question and becomes a profile design question. When hundreds of identical units must assemble in the same time with the same fit, the panel groove belongs in the extrusion section rather than in a bag of clamps.
Profiles with an Integrated Panel Groove
A die can form a pair of lips spaced for the panel thickness plus clearance, running the full profile length, so assembly reduces to sliding the panel in and closing the frame. That removes the clamps and the strip, cuts most of the labor, and produces an identical reveal on every unit. Groove depth is set by the retention required, typically 8 to 10 mm, and lip thickness must survive the extrusion run without deflecting. Custom extrusion dies developed around the panel and the assembly sequence usually pay for themselves on the first batch through assembly time alone.
Tolerances and Finish That Decide Fit
Three tolerances decide whether a groove works: slot width, straightness including bow and twist, and cut squareness at the ends. Anodizing adds roughly 10 to 25 micrometers of film per surface, enough to close a groove dimensioned tightly before finishing, so specify the groove after finish.
FAQ
Can you use aluminum extrusion and wood outdoors?
Yes, with three changes. Use isolated stainless fasteners throughout, since exterior moisture makes the galvanic couple active rather than theoretical. Increase panel clearance to the outdoor allowance. And finish all six faces of the wood, including the groove edges, so the panel takes up water evenly and does not cup.
How much load can a wood panel joint on aluminum extrusion carry?
The joint is rarely the limit; the panel is. A screwed or clamped panel spreads load across its whole edge and handles its own weight plus light contact, but it has almost no capacity for a concentrated load or one applied at a free corner. Move that load into the frame with a bracket.
Can you disassemble a wood-to-aluminum joint without damaging the wood?
Clamped and bracketed joints come apart cleanly and the panel can be reused. Screwed joints usually survive one or two cycles before the holes enlarge. Bonded joints do not come apart at all: heat softens some adhesives but damages the finish, and mechanical separation takes wood fibers with it.